Drupal 6/7 and WYSIWYG Integration
What you see is what you get (aka: WYSIWYG) editors are a necessary evil when creating Drupal sites. These client side editors simplify the creation of HTML so that non-developers can create content using HTML mark up. WYSIWYG editors can be found all over the web from email programs like Gmail to social networking sites like Myspace.
So how is this related to your Drupal site? Eventually, you'll finish your Drupal site and you will have to train someone to edit and create new content on the site. Most users probably won't be comfortable creating HTML from scratch. Setting up a WYSIWYG editor can minimize the barriers to entry for new Drupal users. Below are steps I take to set up a WYSIWYG editor in Drupal 6.
- Download and install the WYSIWYG module, http://drupal.org/project/wysiwyg
- Create a "libraries" directory in your sites/all folder
- Visit /admin/settings/wysiwyg and download an editor (I use TinyMCE)
- Unpackage your editor and add the contents to your libraries directory
- Refresh or revisit the WYSIWYG settings page (/admin/settings/wysiwyg)
- If your editor was properly installed you will see a green check mark next to the editor name
- Select an editor for your different input formats and save your configuration
- Choose the "edit" link under the operation column
- Click the "Buttons and plugins" and define the options available for the profile
- Under "Cleanup and output" I usually check off "Force cleanup on standard paste"
- In the "CSS" section I remove some of the block formats and set "Editor CSS" to define CSS
- Define reusable styles in the CSS classes text area (Things like floating images, borders, text styles, etc)

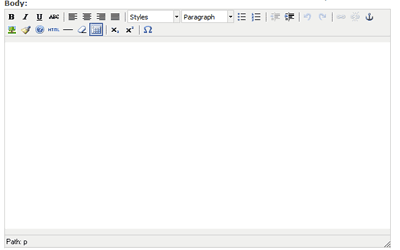
What you should see if everything was configured properly
Configuration gotchas:
- Make sure you select the correct input format
- If you have troubles with content disappearing check your input format (try the HTML filter)
- Image upload is not native (use file attachments)